Moldex3D Studio API Function to Experience
Daniel Hsiao, Staff Engineer at Technical Support Division of CoreTech System (Moldex3D)
Moldex3D Studio API introduction
API (Application Programming Interface) plays a role similar to a waiter, but instead in an application – a transmitter of requests and responses, and bridges between different applications, like a waiter conveys guest requests and responses to the kitchen. Moldex3D Studio API by COM (Component Object Model) technology defines and provides application programming interfaces. COM objects can be accessed in a variety of programming languages, such as C# and Python, enabling external programming to access Studio COM and utilize the API function. Moldex3D Studio API parameterizes different functions and integrates them into an automatic and standard design and analysis workflow. Here, users utilize the study on filling time to optimize injection pressure as an example and show how to transfer several operations with UI to a one-click-to-go function.
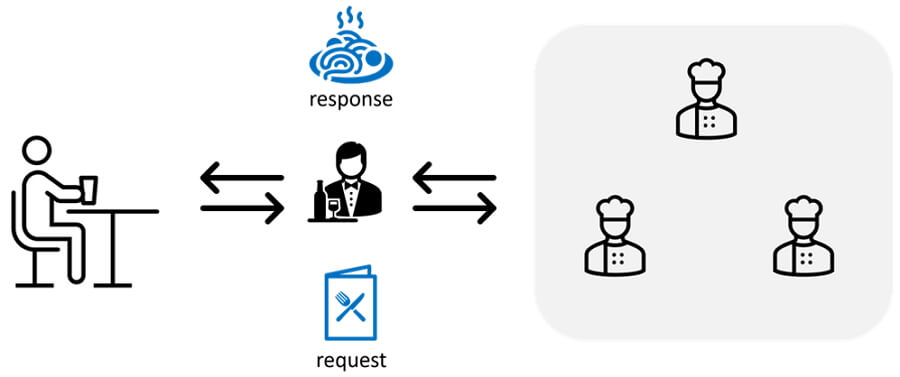
Figure 1 – API plays a role similar to a waiter in an application
Section 1 – Need API tools to drive Moldex3D Studio function setup program
Before starting with API tools that drive Studio and its functions, it is required to install the following:
- Moldex3D Studio 2023
- Python (Example and Help generally edit code tool or other edit code tools)
- Visual Studio code (suggest edit code tool)
For how to install these programs, go to the references provided in the end. To follow along with this study and get started quickly with Moldex3D Studio API, go to here and download the materials used in this article, which include:
- Modeling data used for the initial design for reference (part & runner model and material file)
- Project path used in this this case
- API code used in this case
- Introduction to the above sample (Readme EN/CH)
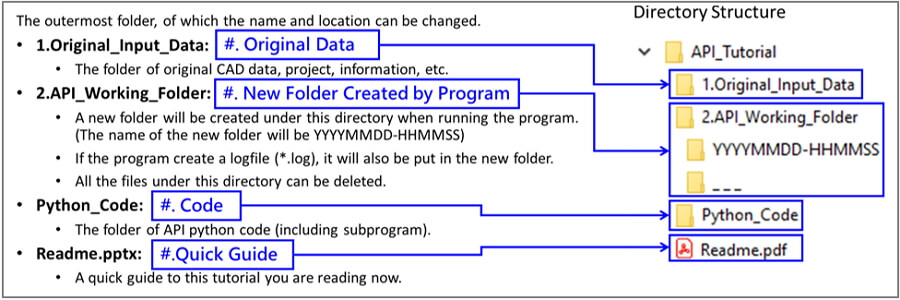
Figure 2 – Sample material
Section 2 – Find Minimum Injection Pressure
In the Python_Code folder of the downloaded sample, open Find Minimum Injection Pressure.py. The scenario to be demonstrated in this article is:
- A Moldex3D Injection Molding (IM) project with analysis settings and other process conditions have already been set for the product design (as shown in Original_Input_Data)
- The designers want to make further adjustments to the filling time within a specified range (0.5~10sec) for better VP-switch pressure (to be processed in Working_Folder)
- By finding the minimum injection pressure value, designers can determine the optimized filling time for on-site reference (too fast filling will cause shear stress while too slow filling will cause melt freezing and short shot.)
Launch python code.py (Run python file as shown below) and Studio and its API functions will be called respectively to finish the tasks listed below for the designed goal.

Figure 3 – Running python code
- Call Studio API and read Original_Input_Data reference modeling data
- In API_Working_Folder, create a new project, Run1 and import the part & runner model from the reference data
- Create surface mesh & solid mesh, import material, set a default process condition, and set the Filling time to 0.5s
- Copy to Run 2-9 and modify Filling Time with each corresponding value (~10 sec variation)
- After setting runs for different filling times (Figure 4), submit batch runs to Computing Manager.
- When all simulation runs are finished, create a log file location in API Working Folder with VP switch pressure of each and the run ID for minimum pressure (Figure 4)
Now that all API functions have been processed, open the log file to see different parameters and results of each run, and find the optimized filling time with minimum pressure for reference.
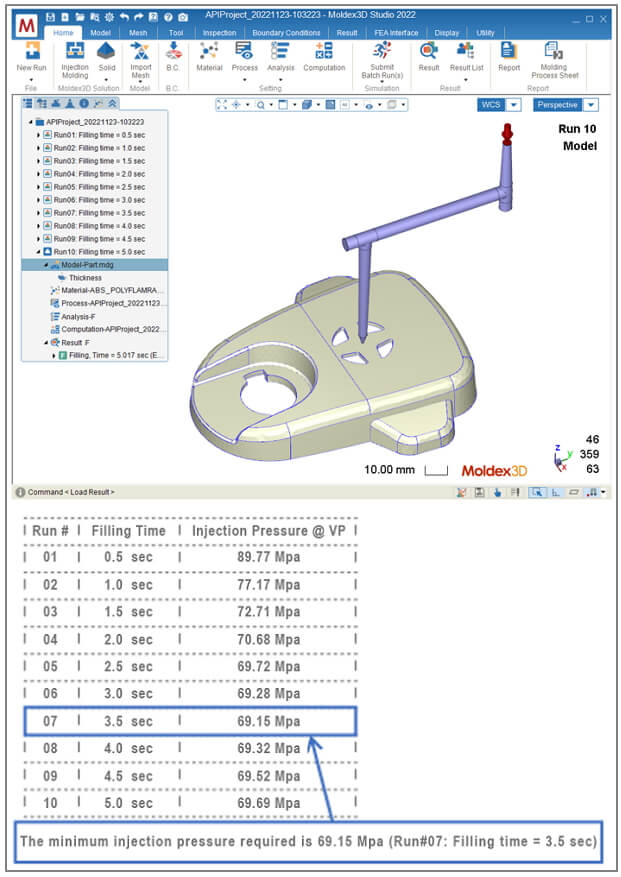 Figure 4 – Reading Log file for pressure result with different filling times
Section 3 – Manual Actions vs. API function comparison
The API functions have been used here are: (1) Create project and import CAD in a new run; (2) Create mesh model; (3) Import material; (4) Set default process condition and modify Filling Time to 0.5sec; (5) Copy run and modify Filling Time; (6) Repeat (5) 8 times; (7) Submit batch runs; (8) Wait for analyses to be finished; (9) Read filling pressure result; (10) Organize result data and find the best settings. With API, this can all be done in just one click.
For one-time use, the user interface designed in Studio may be faster and more convenient for designers. However, in the standardized process under Simulation Driven Design, the work may need to be repeated hundreds of times per year, numerous variables and execution actions. Therefore, the use of API is necessary to develop an automated workflow.
Note: In Moldex3D 2023, a new function called Script Wizard has been added, allowing users to integrate their own API functions into the Studio UI. Though not all the API functions are supported, let’s look forward to more interesting functions in the future with Moldex3D.
References – Making your own python code
The above is just an example and you can create your own python code. Below we provide some resources for learning how to build API functions.
http://support.moldex3d.com/2023/api/index.html
https://www.python.org/
https://visualstudio.microsoft.com/
Bopp Packaging Tapes, Bopp Packaging Sealing Tape,Carton Adhesive Package Sealing Tape
Grand Fiberglass Co.,Ltd. , https://www.cngrand.com